What I carried in my wilderness first aid kit didn’t change too much from my original gear list for my hike on the Pacific Crest Trail. In case you’re not familiar, wilderness first aid has lots of acronyms and abbreviations like Tx, which stands for treatment.
Storage
I carried my first aid kit in a Sea to Summit Ultra-Sil Dry Sack stored near the top of my pack so it was readily accessible. Seems like a small first aid kit case would be nice. But I’ve never found first aid kit cases to do a very good job at keeping the water out. And then they usually have a zipper and zippers tend to break. I also used a combination of quart zip lock feezer bags, 5 in x 8 in zip locks, and 3 in x 5 in zip lock bags to keep my first aid supplies organized and further protected from the elements. When any of the zip lock bags wore out, I replaced them with extras we had in our bounce box.
Injury Tx
Throughout my hike, I carried and replaced as needed a pair of nitrile gloves, a roll of gauze, triple antibiotic ointment packets, transparent semi-permeable dressings, tincture of benzoin, wound closure strips, an elastic bandage, a roll of kinesiology therapeutic tape, and a roll of athletic tape.
I prefer the antibiotic ointment packets over a tube of ointment. There is considerable weight to be saved. Once opened, the open end of the packet can be folded over a couple times and taped shut. I never had a problem with ointment getting on other things inside my first aid bag. I also used this technique with opened hydrocortisone packets.
Sometimes we needed at least three elastic bandages in our group of three. But we only had two. So, with two ankles and a calf in our group hurting at the same time, someone had to suck it up or try to use tape. In the future, I’m considering carrying two elastic bandages. They are useful for wrapping sore joints and extremities, and for building splints. They are also washable and reusable.
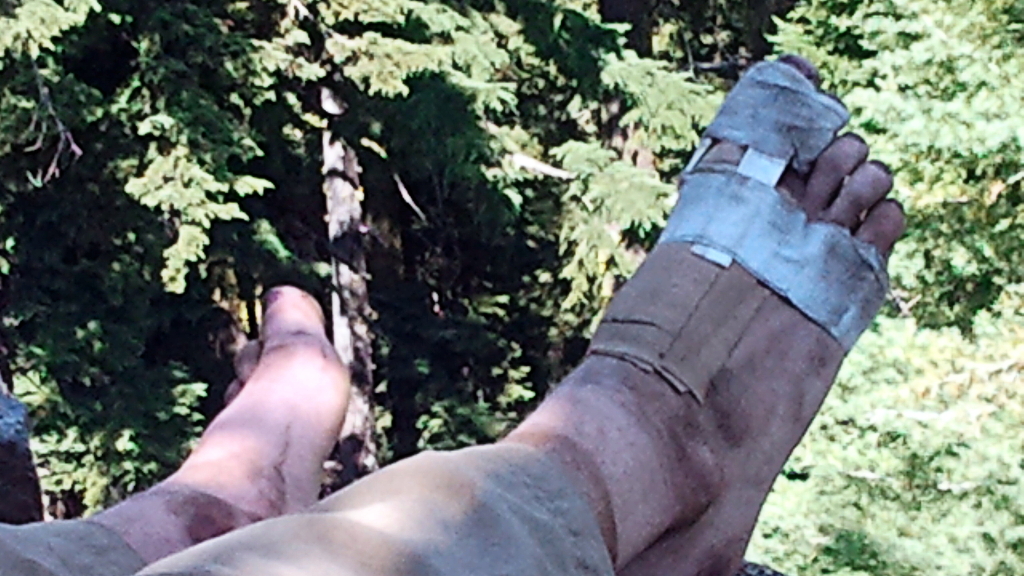
Depending what I had on hand and the injury being treated, I used kinesiology therapeutic tape, duct tape, athletic tape, and leukotape while on the trail. Mostly for my blisters. But also to tape Blaze’s and Dances With Lizard’s blisters, to tape Blaze’s ankles, to tape Dances With Lizard’s Achilles tendon and splint her big toe. The kinesiology therapeutic tape performed the best of all of them. This tape is amazing. It stretches to the same elasticity of skin, is breathable, and sticks for days even on dirty, sweaty, and sometimes wet hikers. My first roll was KT Tape brand that I purchased pre-hike at REI. It was bright blue and came in a roll of pre-cut strips. The next one I bought online. It was Kinesio Tex Gold brand in a roll that was not pre-cut strips. I got it in basic bandage beige color. I preferred the roll over the pre-cut strips.
Blister Tx
I treated blisters a lot. Mostly my own. Of five months on the trail, I think I had only a month and a half without blisters. But that’s a whole other story. I put the blister bandages I initially brought in a hiker box. They were too small to use on my blisters. My blister treatment usually involved draining the blisters, cleaning the blister and the area around it, and taping them with kinesio tape (when I ran out, I would use the other tapes as backup). Sometimes I would use the thick moleskin under the tape to provide some cushion over the raw and painful area. I tried some mole foam under the tape. It didn’t work so well. The mole foam tended to move from where it was applied under the tape. That would hurt. When the moleskin was used up, I got more and I also got some small second skin type pads to go over the blisters before taping them. I also would occasionally carry epsom salts and a one gallon zip lock bag. These were good for making hasty foot baths when blisters were extra painful. I found the epsom salts to be good for drying out the blisters and hardening the tender, new skin under them. In the future, I will be carrying the kinesio tape, thick moleskin, and second skin type bandages for blister treatment.
Chaffing Tx
I started out carrying Gold Bond, Desitin, and Body Glide for chaffing. I had found each in a small, travel size and was using trial and error to see which worked best for me. I never used the Desitin and put it in a hiker box. The odor caused me to shy away from it – probably something about changing diaper days and hiking with my grown daughters. Wierd. When the Body Glide ran out, I did not replace it. I did not find Body Glide to be readily available in trail towns. Gold Bond in a travel size was always in the grocery stores when I needed to restock. I found the Gold Bond to work for all my chaffing problems. Gold Bond ingredients include menthol for soothing and itch relief, zinc oxide as a skin protectant, and talcum powder for absorbing moisture. I also took to powdering my feet with Gold Bond before bed – felt nice and de-odorized things a bit. My tent mates appreciated that. The Gold Bond powder would tend to escape the container it comes in and scent up my pack and gear. I transferred it to a small, 2 oz Nalgene container after purchasing it to prevent this. I’ll just be bringing Gold Bond along in the future for chaffing treatment.
Medications
I brought along ibuprofen, aspirin, imodium, benadryl, hydrocortisone, and Tecnu. To this I added sodium naproxene. I found naproxen sodium (Aleve) to be better for relieving joint and muscle pain than ibuprofen. I carried a lot of aspirin but none of it ever got used. None of the Imodium was used. I guess we were fortunate that none of us got the hiker trots. All the other medications served their purpose at one time or another.
I bought 100 tablet bottles of the pain relievers. I put about 50 tablets in a 3 in x 5 in zip lock bag to carry on the trail and the bottle with the remaining tablets in our bounce box for resupply as needed.
Reference
I carried a copy of the National Outdoor Leadership School Wilderness Medicine Institute’s Wilderness Medicine Field Guide. The reference weighs 2.8 oz and is made of water resistant paper. I had intended to cut the spine off, scan it, and carry it weightless in my smartphone. But I never got to cutting the spine off and scanning it before it was time to start hiking. The majority of us don’t remember all the details of our first aid training. In wilderness first aid, there is often quite a bit of time with a patient after the initial treatment of an injury. I thought it would be good to have a reference handy for double checking my treatments and the care to be given next. I actually used the Field Guide several times. And once I got it out because I was bored and wanted something to read. However, I wont’ be carrying it again. My copy of the Guide will be in my smartphone on my next long trail (but please don’t ask for a copy – I support NOLS WMI and won’t be giving away their for purchase, copyrighted material).